Weapon Selection
There are age old-debates surrounding the efficiency of hunting rifles and calibers, and the option of using a shotgun. For those just getting started and looking for their first coyote, the answer is simple: use what you already have and what you're comfortable with.
“The right rifle is the one you're comfortable with.”
Many hunters start with a rifle or shotgun they already trust. A familiar trigger and scope lets you focus on the hunt and learn everything you can with confidence in your shooting ability.
If you don't have a firearm, a rifle chambered in .223, .243, or .22-250 will be a solid all-around choice. 12 gauge shotguns loaded with 04 Buck or BB are also a great tool to have. Whatever you choose, just make sure it's properly zeroed or patterned before heading into the field.
Field Tip: Shotguns
Coyotes can break cover fast, giving you seconds to react and from much closer than you may expect. A shotgun is always a great tool even in more open country.
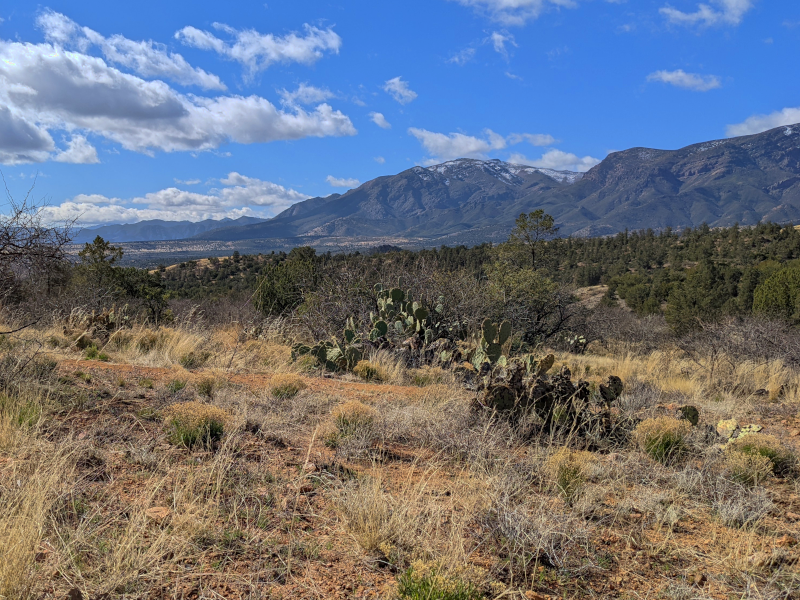
Clothing and Camo
Although predators have sharp eyes, camo isn't always mandatory for repeatable success. However, breaking up your outline is. Earth tones and patterns that blend with your environment are fine, but we've found that using cover or concealment and sitting still matter far more than what you wear.
Reflection can be a slightly different game though. Rifles and tripods are great examples of potentially reflective items. Applying camouflauge can help reduce your visual signature on-stand if the sun isn't perfect.
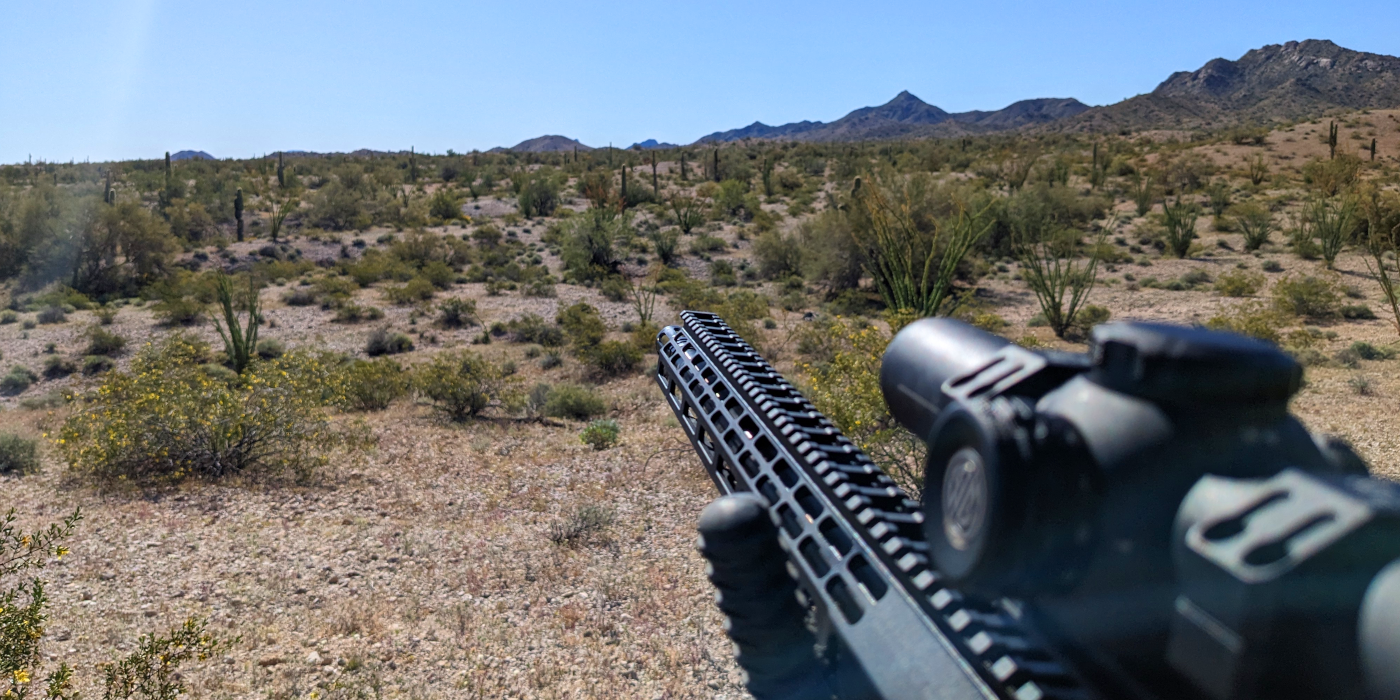
An example of a reflective rifle on a sunny day, a few minutes before a lone coyote came in. It's not always make-or-break, but giving yourself every advantage can make a difference.
Comfort is critical though, and where good clothing starts to shine. Between the weather and sun, properly equipping yourself with quality layers and a good set of hiking boots becomes key for longer trips. It's easy to forget until it happens, but an adequate setup can make the difference between a memorable day and a miserable one.
Field Tip: Extras and Backups
Everyone knows to check the weather. But bringing gear and layers even if you think they aren't needed can save a trip (within reason and season). For longer trips, it's easier to throw a small box or bag with extra layers and backups in the truck than realize you need them in the field.
Accessories
We typically recommend every predator hunter consider the following baseline accessories to bring:
- A rifle sling
- A seat pad or stool
- A shooting rest: shooting sticks, monopods, bipods, or tripods
These don't need to be fancy, but they need to be functional. Combined with your firearm, these ensure comfort and shot stability during each stand. If you're a tripod user, make sure to consider and test how you'll be carrying it into stands. A good setup is a quiet setup, and all of these play into that.
Field Tip: Keep It Simple
Focus your early hunts on learning wind, approach, and patience: not testing gear.
Let experience decide what truly earns a place in your setup.
You'll also want to consider the following:
- Are you going to bring binoculars or a range finder on stand?
- If you purchase an electronic call, how are you carrying it?
- How are you going to carry your electronic call's remote?
- How are you going to carry hand calls?
- How are you going to take coyotes back to your vehicle?
Combined with the baseline items, these are all good examples of other things you'll need to bring. It's also where personal preference takes control. Lanyards, straps, slings, bino harnesses and drags can all have their place. We use bino harnesses to hold everything: remote, hand calls, drag ropes, and a range finder. Added slings on e-calls and metal-legged stools keep them from clanking while we walk in.
Lots of hunters opt for backpacks to carry these items. But ultimitely, the choice is yours. Time in the field will be the best way to refine the items you bring, and how you bring them.
E-Callers vs. Hand Calls
Both electronic and hand calls have their strengths, and both belong in a well-rounded predator hunter's arsenal. Understanding how to use each properly can improve your success and make your field time more effective.
Electronic Calls
Convenient and consistent, so long as the battery is charged.
- Great sound libraries with thousands of options.
- Keeps the animals attention away from your position.
- Often include decoys built-in.
- These aren't bulletproof: be careful with shot placement when animals get close.
Hand Calls
Lightweight and inexpensive, but make each stand truly yours.
- No batteries required and cost effective.
- Personal volume, pitch and rhythm control.
- Requires practice but it pays off to have the skill.
Electronic Calls:
Electronic calls are your ally for precision and consistency. Carefully placed, you can get your sounds out there while keeping yourself hidden with minimal movement. And with the built-in features and decoys, you'll have the confidence that there's no coyote out there you can't bring in.
Field Tip: E-Call Placement
A decent starting rule of thumb on caller placement is: "if they can see it, I should see them". Animals will not always stop close to the e-call, and if they hang your shot window can be short.
Remember, convenience is not a replacement for the basics. Top brands all have excellent choices and sounds, but at the end of the day these are just tools. Bad location, stand setup, wind usage, and fidgeting can ruin a stand much faster than playing a bad sound.
Hand Calls:
Hand calls require practice but give unmatched control. Volume, pitch and emotion behind the sound become more personal, and stands can feel more interactive than e-callers. Carrying a hand call is also easy in thick cover or when maneuverability is key. Throwing them in your pockets, or using a lanyard is easy and quiet.
A long day can test your lung's endurance though, I've seen my share of hunters jokingly say they need to work out more after a few stands of using them. You'll also need to practice, but keep in mind you'll be holding a firearm in the field too. Being comfortable using your hand calls with a firearm at the ready, and not creating too much movement with your hands and body to use them can aid your success.
Creating a Plan
Hunting without a plan is one of the biggest mistakes beginners make. Although you don't want to overthink it, taking some simple steps can increase your odds of success. Additionally, working with a plan can help you to learn from success and failure - rather than simply going home wondering why nothing came in.
When you're starting out, make sure to not over-complicate things. Failure is never fun but it's one of the best instructors you'll find. Learning to enjoy the process and not simply chasing fast luck or success helps avoid burning out from frustration on the long days. These lessons and small steps forward compound and make you a better hunter in the long run.
Taking this a step further: As you learn more about working with terrain, movement patterns, animal pressure and timing you can start to tailor your stands to suit them. There's a lot of variables that go into hunting, some you can never fully account for. But the more you stack the odds in your favor, the more consistent your results will be
Field Tip: Physical Fitness
Physical fitness is a key advantage in predator hunting.
Over the course of the day, you may find yourself regularly walking over 200 yards one-way into stands with all of your gear, and out dragging coyotes.
The better shape you are in, the less fatigued, more quiet and safer you are in remote areas.
You don't need to be a world-class athlete, but basic physical ability and core/leg strength pays dividends both in life and in the field.
The General Idea
The primary idea behind planning a day of varmint calling is simple. You know coyotes are in an area, or maybe you saw fox or bobcat sign. You've checked the wind, and know where you plan to make stands at. Armed with your hand calls or electronic unit, you're all but ready to sit down and stretch the legs on the shooting sticks.
On-stand, the core ideas from hunting other species remain the same. Close truck doors softly,quietly set up, conceal yourself and avoid unneeded movement. When you start calling, keep your eyes moving and try to avoid staring into your e-callers remote for too long.
Locating Coyotes
If you're just starting with hunting, or simply don't know where to call coyote at - this section is for you. Calling coyotes in areas that don't hold predators is generally a waste of time, and will only lead to frustration. Breaking down how to find quality ground greatly improves your success, and avoids wasting time entertaining birds.
“You can't call in what isn't there.”
For varmint calling, locating coyotes is the process of finding ground that holds coyotes in the moment. It's one of the best ways to ensure you aren't wasting time calling areas without predators. There's differing opinions about how long you should wait between finding predators in an area and hunting it. We've found it's most productive to hunt it within a few days max, to avoid change over time or outside influence affecting the lay of the land.
Field Tip: Locating
During the peak hunting season, coyotes move. If you're going to locate try to do it at most a few days prior to when you plan to hunt the area.
Finding Potential Ground by E-Scouting
Modern satellite tools make pre-hunt scouting easier than ever. Browser and mobile apps will show important property information, and give you a detailed view of the landscape. When starting out, look for areas that fits at least one of the basic needs of holding predators:
- Is there water within 1-2 miles?
- Is there foliage or terrain features that can support the needs of prey species?
- Are there edible plants or crops? (coyotes are opportunistic omnivores)
- Are there movement corridors between "good" looking areas like farmland and hills or water?
- How much human activity is nearby? (OHV and big game seasons can change animal patterns)
If one or more of those can be checked off, there's a chance the area is worth looking at. Just be sure to ask yourself the following, so you can adjust your plan accordingly:
- Is the sun going to be in your eyes when making stands?
- Is there more than one entry in case winds shift?
- How thick does the area appear to be?
- Are there any terrain fetures you can use to your advantage?
- Do the roads appear to be something your vehicle is capable of using?
- Is the land private or public, and is it open for hunting?
- Are there any other game seasons taking place? (bird, deer, etc)
Once you've asked and answered those, you're ready to go check the area out.
Field Tip: E-Scouting
There's ton of benefits from top e-scouting applications. But there's no subsitute for seeing an area yourself. Physically going to an area and scouting can confirm if the area looks good, or is good.
Using Tracks and Scat to Locate Predators
The method so simple, it almost needs no explanation. Using dens, tracks and scat to locate areas that hold predators, or at least areas predators are moving through is easy. Walk or drive roads, washes, hill bottoms, and field edges. Look for scat on potential territory borders, or funnel points like aqueduct bridges that concentrate animal movement. Keep in mind that old signs and dens are not an indicator that an area reliably holds predators, just that a predator was in the area before.
If you're completely new, using the internet to compare picture of coyote, fox, bobcat or signs from larger predators like mountain lion and bear can be a valuable tool. Knowing the difference between a domestic dog track and coyote track in the mud can save you time calling an area that's frequented by coyotes, and one frequented by hikers.
While doing this, remember the basics.
- Don't over-walk an area and spook out animals.
- Keep tabs on prey species, terrian features, cover and ground texture (rocky, sandy, etc)
- If you find scat, does it show signs of animals or plant matter?
- How many people are you encountering, or seeing signs of?
- Always bring extra water and snacks in case you get stuck.
Before long, you'll have a good picture on if the area is worth coming back to. To make efficient use of your time with this method, it can be worthwhile to find two or three areas to drive around and explore while you're out.
Using Howls to locate Coyotes
This is a personal favorite of many hunters. Late nights and early mornings become prime hours to find areas that hold coyotes easily, and from the comfort of a vehicle.
Wake up early, and try to reach your spot one or two hours before sunrise. Assuming this area is a dirt road, stop at the entrance when you first pull off. Make sure the windows are down and the engine is off so you can hear, and simply hold the call out of the window and play a howl - Solo, Pair or Group. Even police sirens if you'd like. Once the caller is muted, just sit and listen for a few minutes to see if anything responds.
If you get a response, mark the area on your maps and move on. You don't want or need to hang around and see them with your eyes for this process. Drive down the road anywhere up to a mile depending on terrain, and repeat the process.
In the end, you'll either know if nothing seems to be in the area, or if you found a new honey hole. Combining this information with any signs and data you can gather from other scouting methods can greatly improve how you approach coming back to hunt.
Field Tip: Howling
Just because they respond to a howl, doesn't mean they can be called in and doesn't paint a picture of pressure and other factors affecting an area. Also, during certain times of the year howling may not illicit many responses. Regardless, it's a decent way to quickly find if the area holds coyotes at all.
Practice in Motion
At this stage, you've got your gear ready. A good area's been selected and you're ready to plan out your stands. Breaking down how you approach the area can help target known locations holding predators, or adapt a plan to changing variables.
Wind and Sun: How they affect your approach
We've all read articles about having the sun to your back, and the wind to your face. There's truth to it, and it's a statement worth taking to heart. There's no outsmarting or masking yourself from a cautious coyote's nose as it circles downwind.
Where it plays into this stage is straightforward, and gives you a few key things to consider:
- How strong is the wind? (too strong or shifting winds have their challenges to work around)
- If you camp, is your scent going to blow into the area you want to hunt?
- When you drive down the road between stands, where is your scent blowing?
- Is the sun going to be at your back, front, or somewhere in-between?
The sun is the easiest to account for, sitting into the sun exposes you and makes you more vulnerable to being seen by movement or reflection. It also can be pretty hard to focus if the sun is burning your eyes as it sits on the horizon. Try to setup stands with the sun to your back or side if possible, even if you drive in with it facing you. This isn't always a make-or-break deal, but it's just another advantage you can give yourself.
The wind however, is almost mandatory to respect. You can get lucky, and we've had coyotes and fox ignore the wind and even humans to get to the caller. By and large though: if the wind isn't hitting your face or side the stand is in trouble. Those who use e-callers can take advantage of crosswinds easily. Putting the electronics out in front of you keeps the animals circling downwind of a spot you aren't sitting directly at. Even in a headwind, putting the caller out to a 45-degree angle can be a valuable tool to stop circling coyotes from busting you. Or if you use a shotgun, placing it directly upwind of you can help pull them further into your lap.
Too strong of a wind may "shut down" animals, and make it more difficult for your sound to get out there. Shifting winds can blow your scent into areas you don't want it, blowing your stand or alerting animals of your presence.
Stand Selection
Stand selection at it's core is finding a way of combining everything we've talked out so far. Getting to where the coyotes should be, with respect to the direction of the wind and sun. Combined with any adjustments you need to make for human presence. Picking areas that hold animals, and give you every advantage possible.
You also want to factor in access, walking distance, terrain and cover. Make sure that you can walk to your stand without skylining or otherwise getting busted. Also consider your weapon. Is this a thick area that you need a shotgun for, or is a rifle more equipped for the task?
If it's an area you know well, you can likely drop dots on a map or you may just know exactly where you're going to sit for each stand. Otherwise, you can roughly plan it out using a map or e-scouting software, but plans and conditions may change once you hit the ground. For areas that are brand new, a rough plan that's adaptable to errors and variables is key.
In the end, this starts to become more of an art than an exact science. Your setup, area, fitness and your equipment will begin to dictate where you call stands, and how far you walk off the trails to make them. If you're keeping an eye for the basics, and working to put yourself in the advantage on good ground you have a recipe for success.
"Dry" Stands
A fairly controversial (in some circles), but extremely common approach to hunting predators. "Dry" stands are done when you don't locate or otherwise pre-scout an area for signs, and simply drive out to hunt it.
This is how a lot of people start predator hunting. They don't know where to go, so they pick a random area and just try it. Driving anywhere from a few hundred yards, to a mile between each stand and calling areas that look the best.
When doing this, you have to keep in mind you're going to have a high failure rate. A good day of dry stands could be as slow as a single animal, or a day filled with excitement. There's no way to know until you're out there. It's always a bit of a gamble, and there's no guarantees that you'll have a good day in the field, or even be able to access the area you saw on the map. Although we typically advise against doing this, as targeted stands and locating always increase your odds, it's a strategy you can use to see what's out there and enjoy being outdoors.
Learning from Stands
Success or failure, there's almost always something to be learned from stands. It can be hard to see on long days where you only see cactus and birds, but stopping to think about what and how you're hunting can greatly improve your process.
Avoiding the idea of "we didn't get lucky today" is the first step toward improving how you hunt. You can say that luck is always a factor, but repeatable success is built from knowledge and experience.
These next sections are primarily written with the idea that you're hunting areas that you know hold predators. But both can apply to dry stands if you're working toward figuring out how to varmint hunt.
Learning from Failure
Starting with stands where no animals came in, before you leave consider the following:
- Did you hear coyotes howling, but never saw them?
- Walk the area: Were you not as hidden as you thought, or were you skylined from certain angles?
- Were there any terrain features that could have been territory boundaries?
- Is it more open ground, and do you think that due to pressure and daylight they simply stayed in cover?
- Did you see any other animals during the stand? (anything from rodents to elk, or things with wings)
Don't be afraid to walk the area, check washes nearby for sign. Look back at where you were sitting, and investigate any key terrain features you were interested in. You don't need to turn it into a investigation, but checking areas out over time may help you gain understanding into how and why predators use terrain and move.
Now lets consider a stand where you called an animal in, but weren't successful in taking it. Still consider the items above, but also look into these:
- Where did the animal come from?
- Where was your e-caller pointed?
- Did the animal see the e-caller or decoy and spook?
- Did you change or stop the sound as it was coming in?
- Did the animal see or smell you?
- Was your view of the animal obstructed by trees or brush?
- Were you staring into your e-callers remote while it came in?
- Did you experience an equipment failure or performance issue?
Equipment failures and performance issues are sometimes painful, but easy to see in hindsight. For everything else here, start to break down the scenario and how things played out. Use this information, along with your stand setup and area to avoid repeating mistakes or make future adjustments on stand. Misses and unexpected animals coming from suprising angles happen, but by and large you can use this knowledge to better your hunts.
E-call placement and direction are also important, and should be looked at. Predators will often approach the strongest source of the sound, directly where the speaker is pointed. Sometimes, this can lead to them seeing the caller from angles you can't fully see them from. Or if you run a decoy, where they notice it. They can also simply "hang up" where they feel safe while they try to figure things out.
We've said previously in this article to place the call where if they can see it, you can see them. This can especially impact you in area with thick, but broadly scattered cover. Try to keep sightlines to the caller in areas that you can reach with your rifle or shotgun.
Learning from Success
Although immediate failure is very common, the opportunity to learn from success is important to not overlook. It's hard to stop and analyze a stand when you're just tasting success, but it's important to not skip it over.
“If something is working: Keep doing it.”
You'll still want to consider everything we talked about in the failure section to break down your stand setup and area. But now it's time to break down what went right, or if things went slightly different than you imagined.
Break down and consider the additional questions:
- Did the animal come from where you expected?
- Was it the species you expected? (coyote vs fox/bobcat, or lion/bear)
- What type of sound were you playing? (prey, pups, fights, howls, etc)
- How long had you been on-stand for?
- Did the animal react or find your e-caller?
- Were you using a decoy, and was it visible to the animal?
- Did your equipment perform as expected?
Taking this information may seem tedious, but it helps to identify patterns in what you're doing correct and building upon your success. Any small adjustments you can make, or things you notice are things that you can either repeat, do better, or replace. Over time, this puts you on the path to continued success and relying less on luck to get the job done.
The Art of Varmint Calling
There's a few topics you may have noticed we've avoided: sounds and call sequences.
There are thousands of amazing e-call sounds on the market today, and wide selection of hand-calls you can purchase. To make things even more complex, there's e-call features to play two at once and change the pitch of them.
Two equally succesful hunters may have wildly different approaches to what they choose, and how they play it. Even with modern electronics, two people even using the same call on different stands can have a different feel.
That said: There's some clear patterns that you'll find, and some clear things to avoid.
Sound Selection
Scrolling any online group or forum, and you're bound to see a question about currently hot sounds. What category, how loud, what time of year, local or non-native species, and more. But even in one area, what works today may not work tomorrow.
Although there's always a popular sound, and many outright proven ones. What we can tell you is simple:
- If you're just starting and don't know what to play at all: start with rabbit
- If you're not having success: try new sounds.
You need to learn and know what sounds you have on your e-caller, and where they are in the categories. For true beginners, starting with rabbit is a simple and ubiquitous answer that's proven to work on predators from coast to coast. It doesn't need to be a rabbit species native to your state.
Volume is always a contested topic, but it has a generally easy rule of thumb to follow. Predators have great hearing, so you don't need to blast rabbit at full volume. You'll find a balance, and sometimes a finess to how loud you choose to play sounds.
“Play the sound loud enough to reach where you think the animals are.”
The most common pitfall we usually see when hunters aren't having success usually tracks too, and is extremely easy to do with e-callers:
- Are you only playing the same three or four sounds every stand?
You can have success with pup sounds, adult fights, howls and all sorts of distress. But if you're only playing a narrow selection of what you have, you're bound to experience limits to your success.
When it comes to what sounds work best for you, it'll be a bit of discovery. Every day and area are different, but starting with the basics and trying new things is the path every varmint hunter walks.
Call Sequences
Akin to questions online about popular sounds, you're bound to find people asking about call sequences. How long to play sounds, how loud, how much silence, and usage of any features that allow playing multiple sounds at once or pitch manipulation.
Although all of those are pretty good questions, what works for one person may not work for another. And what works today what may not work tomorrow. This is where varming calling becomes an art.
“Play sounds long enough for animals to show up from where you think they are.”
Like other sections, learning from your call sequence is important. Keep these in mind regardless of success or failure:
- What sound category did you start the stand with? (rabbit, bird, etc)
- How long were you playing each sound?
- Were you muting/pausing sounds?
- How much, if any, silence did you leave between sounds?
- What specific sounds did you play?
- Did an animal show up to the stand, and if so, when?
Reactionary call-ins happen, and can happen quickly. Even then, still keep in mind how you approached and called the area.
"Start soft, get loud" is a very common approach to call sequences. This usually involves starting with a quiet bird or baby rabbit, and progressing into louder rabbit and bird sounds. It's a proven strategy that works, but even in great areas can still fail if the stand wasn't setup properly.
Here's a few tips we've learned along the way:
- Change sounds, playing the same few sounds after days of failure is a bad habit.
- Change your volume: start quiet or start loud.
- Verify how loud your sounds are in the field.
- Coyotes don't howl quietly, blast the howls.
- Try muting distress sounds on and off to space things out.
- Silence kills: play something and wait, a few minutes of silence isn't a bad thing.
- Play sounds for different lengths. 1 to onwards of 7 minutes can yield success.
If you're like us, you'll find that there's more than one way to approach calling any type of predator. But if you're stuggling, one thing is for certain: change what you're doing. Don't be afraid to play sounds that don't feel perfect to human ears either.
Final Thoughts
Before closing, I'd like to thank you for reading this. Hopefully you were able to gain something from this article to use moving forward.
In summary - gear helps, but it doesn't make the hunter. Keep your setup simple, your approach smart, and your patience long. The best upgrade you'll ever make is your own experience in the field. It's not something that can be taught from behind a screen either, you'll have to go out and experience it yourself.
Always try to keep in mind that predator hunting can be an extremely rewarding, or an extremely infuriating endeavor. Everyone has slow days, and failure is a part of the learning process. We hope that you find and enjoy predator hunting as much as we do.
As a final plug:
If you'd like to learn more about predator hunting, feel free to contact us
or use our scheduling tool to book a hunt with us.